

It would appear to be a stretch to some people that there is a relationship to be made between gardening and the changing environment. There is, however, a direct connection between the manner in which we as a nation cultivate and distribute our food and the carbon emissions that are one of the primary contributors to the warming of the planet.
Are you interested in having a happy gardening, but you’re not sure if you’re ready to start cultivating your own food just yet? We are aware that beginning a garden may appear to be a little frightening, but we assure you that the results will be well worth the effort.
You may grow food and have a flourishing vegetable garden even if you only have a limited space, growing process of the easiest vegetables to plant in your garden space is not difficult to do to even you don’t have enough space or you have small space, just doing the right process of growing your own food of every kind of plants which will provide you and your family with nutrients on a daily basis because you did great about growing food at your outdoor gardens.
Get ready to find out why tending a garden and cultivating your own food is such a smart move on your part.
What exactly does it mean to tend a garden?
Gardening refers to the process of planning and caring for an area of land that may or may not be entirely committed to the cultivation of plants such as flowers gardening, herb garden for your fresh herbs, or vegetables garden for your on benefits.
The benefits of doing your own gardening for yourself
It has been demonstrated to improve mood, as well as reduce levels of tension and anxiety. It is a tremendously fulfilling experience to plant, tend, harvest, and then share the food that you have grown yourself. Our mental well-being has been shown to enhance when we follow the same patterns day in and day out. Activities in the garden, such as watering and weeding, can help to generate a calming rhythm that can relieve tension.
Gardening in one’s own backyard is a fantastic way to make a positive contribution to one’s health and to the safety of their food supply. Consuming locally grown fruits and vegetables is one way to support a healthy lifestyle.
Recycling items such as buckets, dishes, wheelbarrows, saucepans, plastic bottles, and so on helps conserve the environment since it prevents these items from being thrown away or dumped into rivers, which would otherwise be the case. A “garden,” which refers to a personal or household plot of land, is an ideal environment for the cultivation of fresh produce vegetables and leafy greens.
The following are some of the ways in which cultivating a garden in you outdoor space at your home can be beneficial to you:
- Having access to a sufficient supply of fresh fruits and vegetables is a must. Backyard vegetable gardening. Because you will not need to go to the market as frequently, it will save you both time and money.
- Have a healthy family and save money on the organic vegetables your family consumes by cooking more of their meals at home. When you buy organic produce, you can rest assured that it is devoid of potentially dangerous pesticides and other chemicals.
- Your children will benefit from having positive experiences and memories that will last a lifetime.
The Philippines is home to a wide variety of veggies that are ideal for cultivation. The presence of a tropical climate in this nation is beneficial to the cultivation of vegetables. Sunlight is essential for the development of vegetables. Backyard vegetable in growing season need to make it easy to acquire fruit and veggies that are still in their fresh state. Because you will not need to go to the market as frequently, it will save you both time and money.
Have a healthy family and save money on the organic vegetables your family consumes by cooking more of their meals at home. When you buy organic produce, you can rest assured that it is devoid of potentially dangerous pesticides and other chemicals. It creates memories that will last a lifetime and is a constructive activity for your children. In the Philippines, vegetables play an important role in everyday life.
Things to grow in a home garden
Growing a tiny vegetable garden is similar to living in a small house in that it is not as simple as it may appear at first glance. One of the most important aspects of success is selecting appropriate plants. Pick dense, high-yielding plants that will fit in a smaller area or small greenhouse but will still yield a substantial amount of produce.
1. Basil
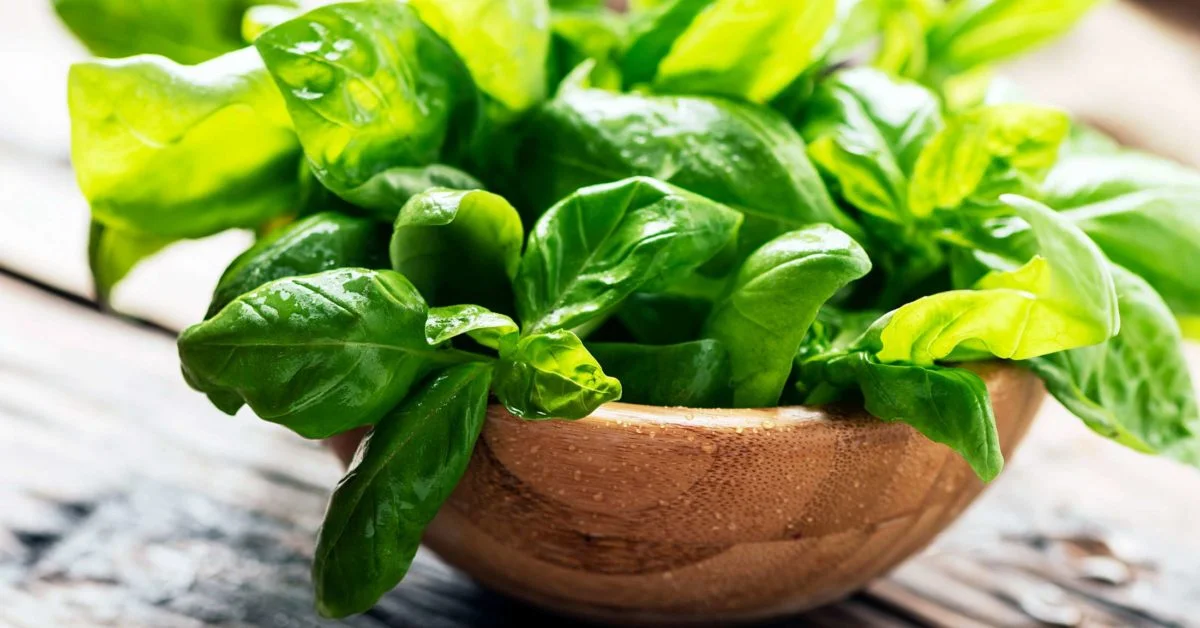
There is a compelling reason why sweet basil should be cultivated by every gardener. The delicate leaves excite the senses and impart a fresh flavor to a variety of dishes, including pesto, salad dressings, and more.
Read Also: 10 Best Herbs to Grow at Home
There are more than 80 different forms of basil, and among those are a few “miniature” variants that are ideal for gardens with a limited amount of small spaces. One of the most dwarfed forms of sweet basil, known as Pistou, is an excellent candidate for growing in a small pots, large pot, hanging baskets or window boxes. A larger planter could benefit from having an edge created with the tight green mounds.
2. Pechay

Also known as pet says, is one of the best vegetables that requires the least amount of effort to cultivate in the Philippines. This particular kind of vegetable can be harvested after only thirty days have passed.Growing this type of crop doesn’t require much effort.
The seed must first be germinated in a seedbox before it can be transferred into its final location. After that, it needs to be watered once every 24 hours for the next 30 days until it can be harvested. The cultivation of pechay is a simple process. If you had a plan for your garden, it would make things much simpler.
To begin, you should begin by preparing the good quality soil by cultivating it with the equipment that you have available in your garden. The seeds should next be germinated by placing them inside either a seedbox or a seed tray. When the pechay have germinated, reached a height of a few inches, and produced a few leaves, it is now time to transfer them.After that, you can spread fertilizer.
We highly encourage that farmers use organic fertilizer since, in contrast to the conventional fertilizer that they buy from the store, it does not contain any harmful chemicals and is acceptable for human consumption. In thirty to forty-five days, once the peach tree has been planted, irrigated, watered, and otherwise tended to, it is ready to be picked.Pechay can be harvested in one of two different ways.
To begin, if you have more pechay plants planted, you have the option of selecting either two or four pechay plants to cook. Second, once the plant has been pruned, the elder leaves can be removed for harvesting. You will be able to cultivate additional leaves using this method, and the pechay will continue to expand.
3. Ampalaya
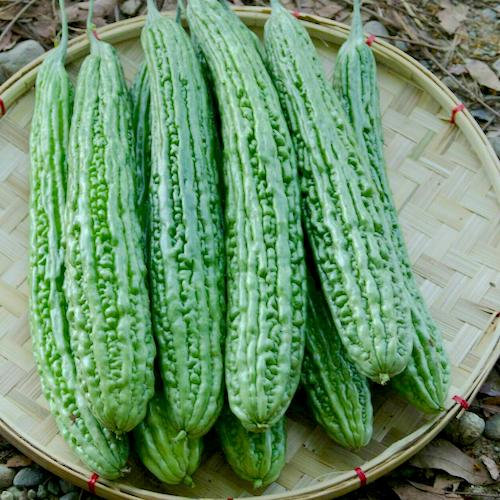
Also known as bitter gourd, is an excellent choice for a vegetable crop to cultivate in the Philippines. Although they are bitter to taste, these easy veggies contain a wealth of healthy vitamins and minerals that are essential for our bodies.
As a result, the planting of this veggie couldn’t be simpler. On the other hand, acquiring the initial Ampalaya seeds would be beneficial to your efforts. You can get seeds by going to a local farm store that sells them. You might also inquire about seeds from local farmers in order to receive them more quickly. You can purchase seeds at physical stores or on the internet. Both options are available.
To get started with cultivating seeds, you should start by cultivating them on a seedbox. If you like, the plant can also be planted in the ground directly if that is how you want to do it. It is entirely up to the planter to decide whether they will plant it directly or indirectly. After being planted, this vegetable plants have a requirement for fertilizer. Maintain it with consistent feeding and watering.
After 90 to 120 days, you can begin harvesting Ampalaya when it is still young and fresh. Ampalaya is a crop that is simple to cultivate. When the Ampalaya has reached the appropriate size and its skin has reached the appropriate maturity, it is ready to be harvested. To get started, cut the Ampalaya fruit so that it is no longer attached to the string-like stem that it once had.
4. String Beans
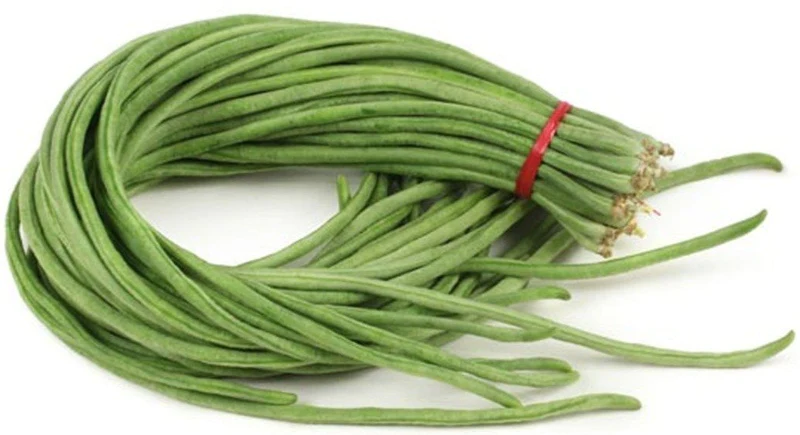
The Philippines is also the ideal site to cultivate string beans, which are also known as stews. These are the kind of vegetables that are lengthy and grow upwards. Vine vegetables are like this one. Our company is known for its string beans. The ideal situation would be if you were to plant them in the ground directly. Because of this, it does not function properly with indirect plantings, such as putting it first on a seedbox.
It would be beneficial to prepare your garden plot. Additionally, string bean seeds have to be of a very good quality. Place the seeds in a hole that is one inch deep and formed with a stick or trowel. Following that, cover the dirt with more soil. The seeds will begin to sprout as soon as they are exposed to water.
The addition of wires or strings to it would make climbing it much simpler. Following this, there will be a ring of leaves that hang from it and develop above the ground. In the normal course of events, after three months it will first transform into young string beans and subsequently into blossoms.
Beans that are grown in strings are much easier to harvest. When string beans are ready to be harvested, cut them down to the base of the fruit. They develop into long pods that are cut off at one end during growth. Because string beans often flower towards their base, you will need to harvest them carefully in order to obtain a greater number of pods.
5. Okra
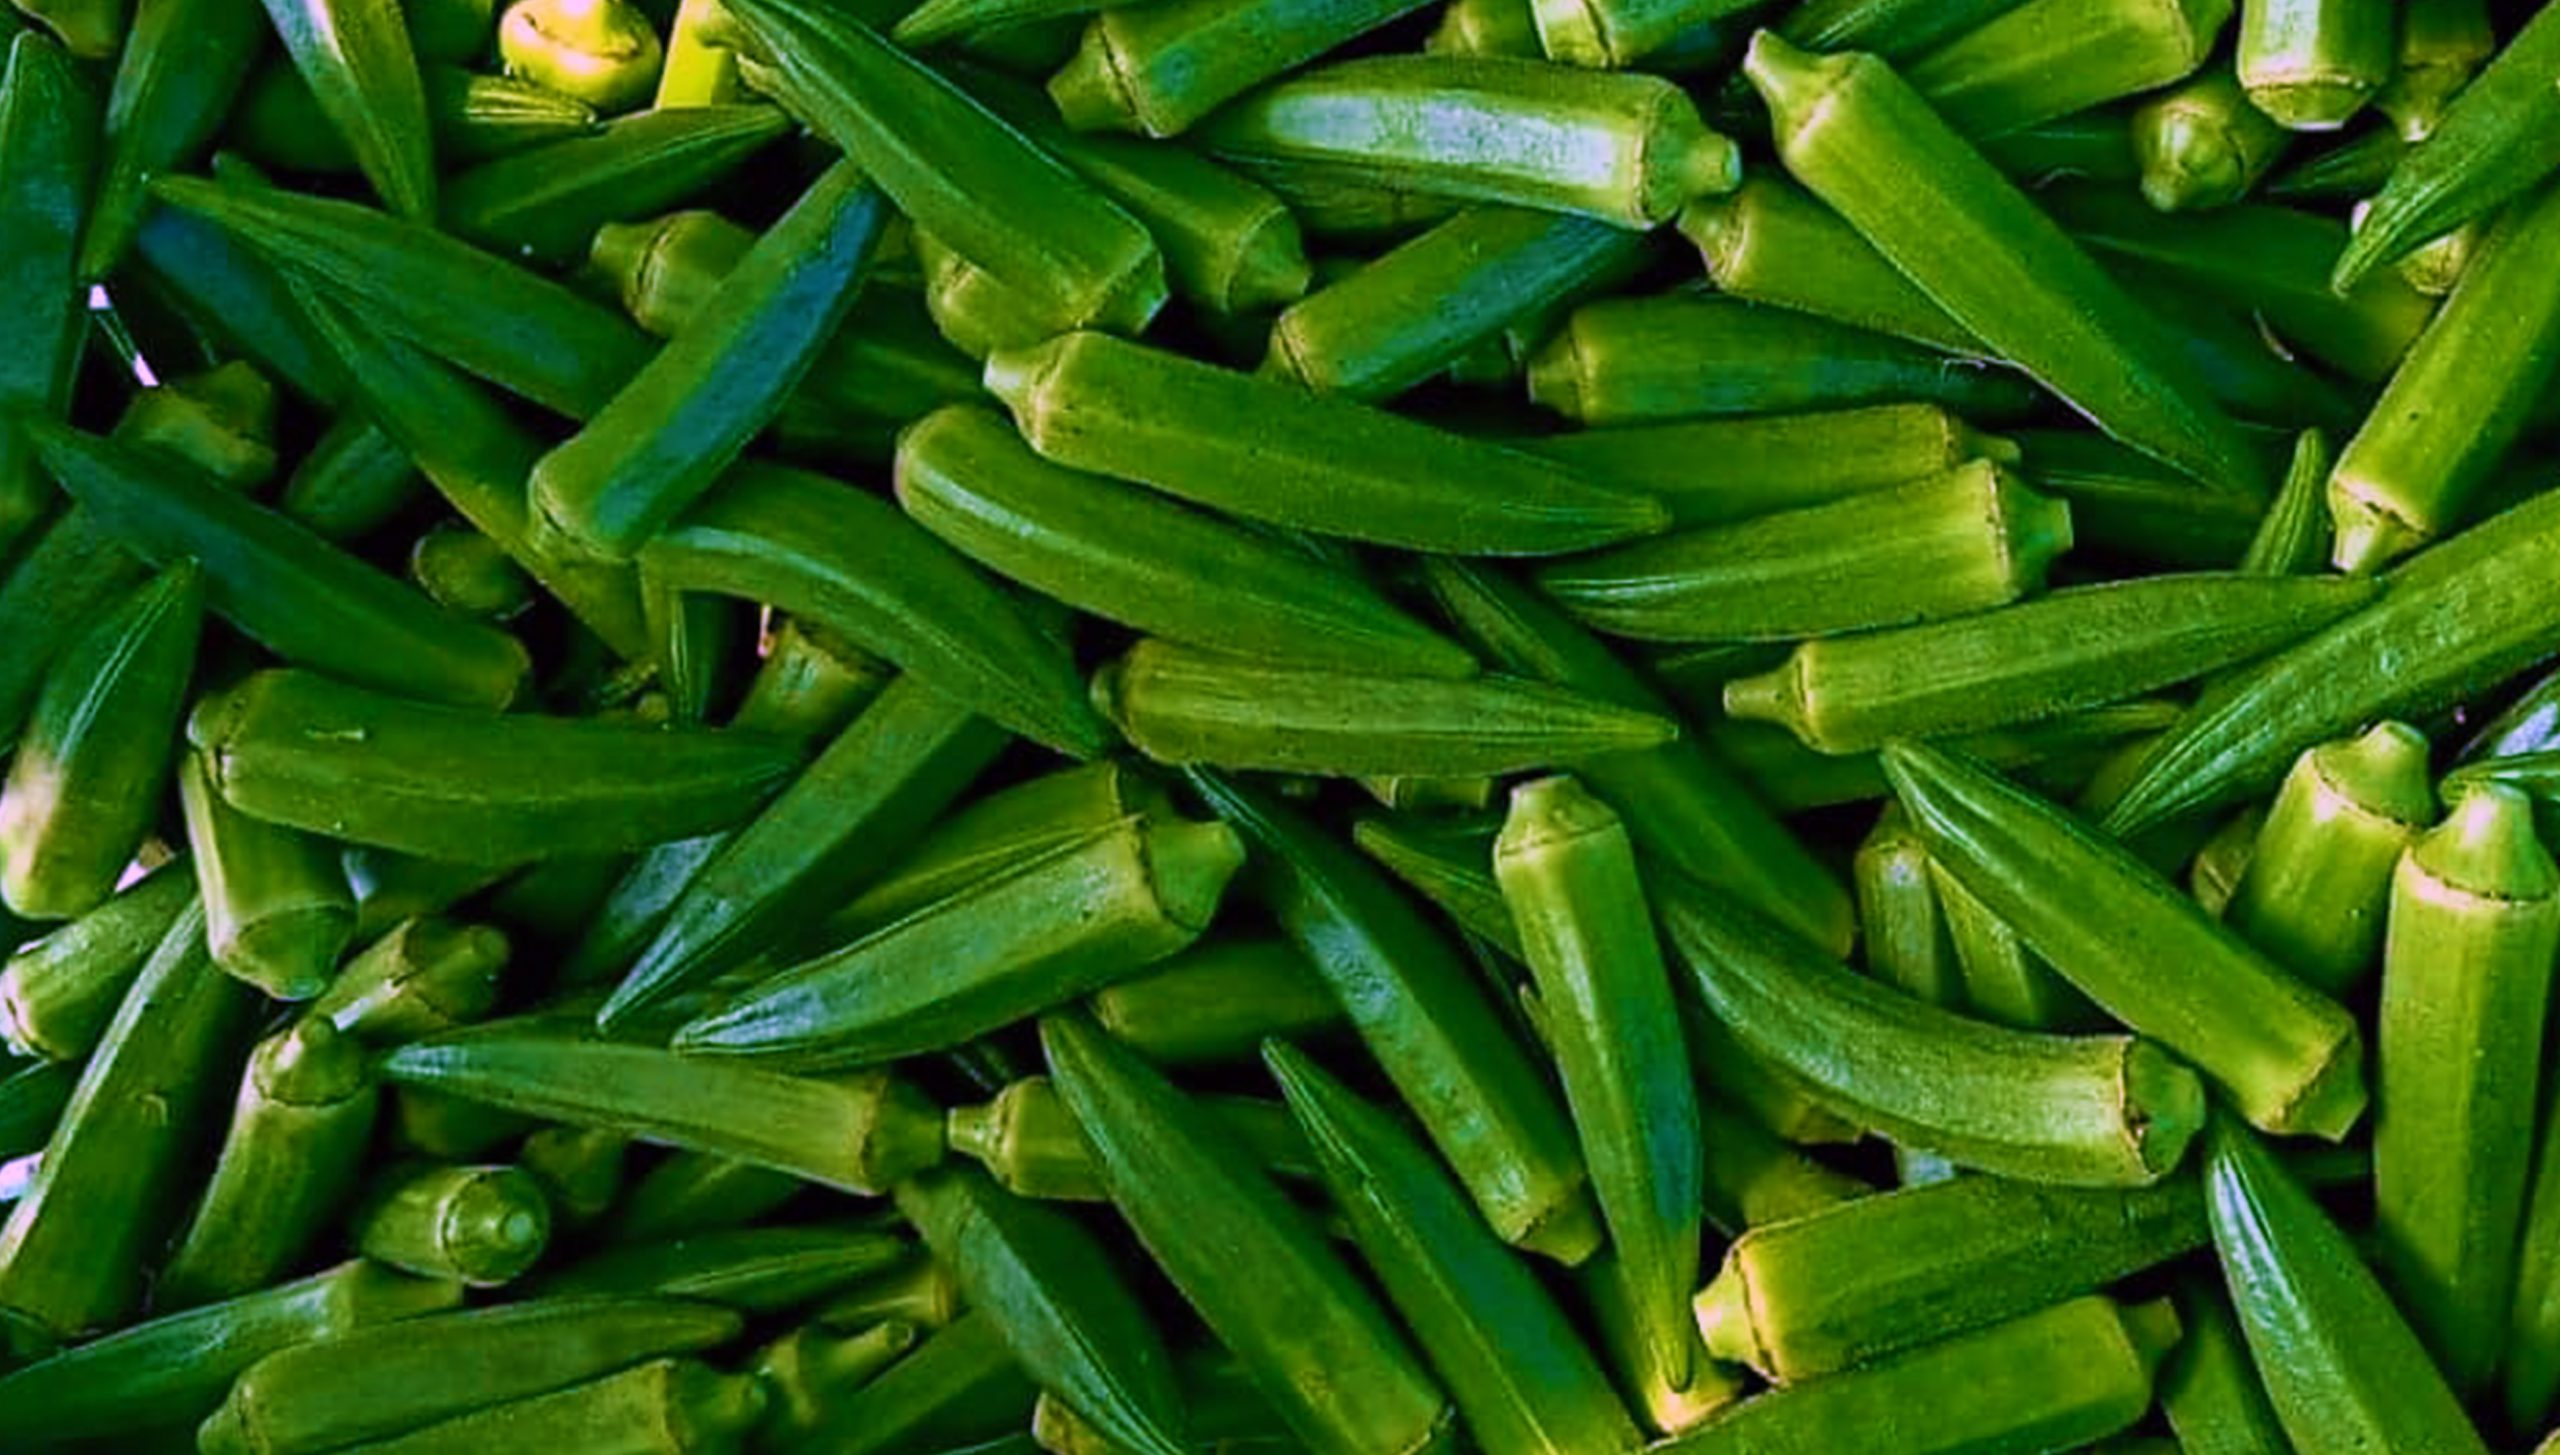
Okra, often known as ladies’ fingers, is a delicacy that is widely consumed in the Philippines. Okra is a crop that is simple to cultivate; you can plant it directly, and it germinates in a short amount of time. However, it is more likely to flourish in conditions that are tropical. On the other hand, okra thrives in conditions with increased sunlight.
Direct sunlight will result in more favorable outcomes. You should be able to gather additional okra between the ages of three and four months. Okra should be harvested as soon as possible because it loses its edible quality as it ages. To harvest okra, cut it at the base of the stem. Then, if you want to enjoy a great vegetable, you should take advantage of okra’s youthfulness and freshness.
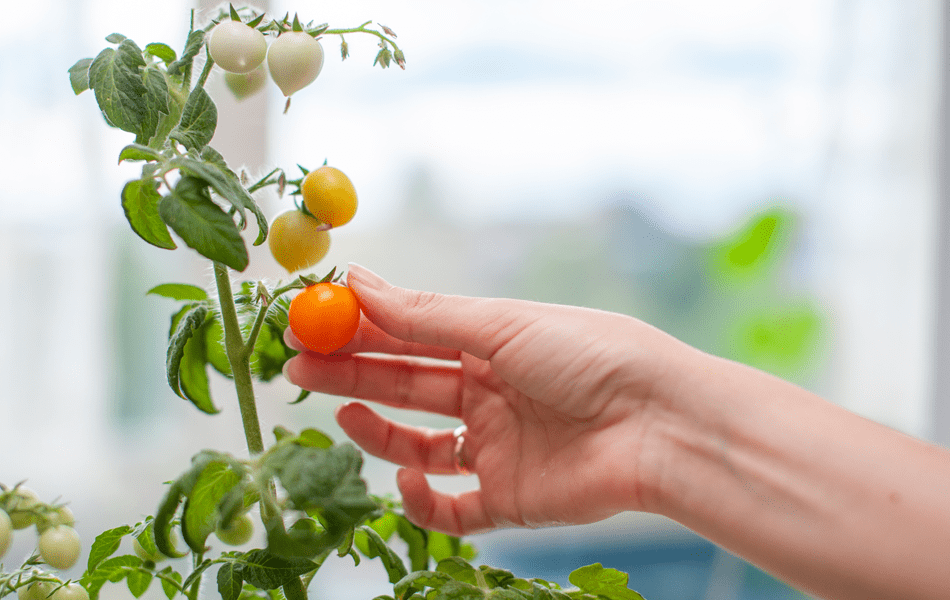
6. Tomatoes
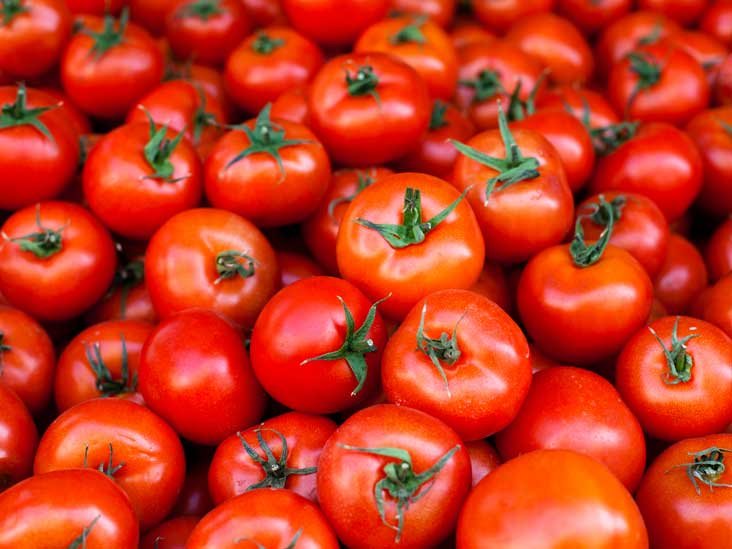
Tomatoes, which are well known to be particularly easy to cultivate, are particularly well-suited to the Philippines. However, in order to harvest this type of food, you will need to wait about three to four months. Tomatillo plants and pechay plants are very similar to one another. When it comes to your situation, it would be beneficial if you first grew the seed on a seedbox and then transplanted it to the location that was specified.
When you plant tomatoes, it would be helpful if you placed the young tomatoes approximately two to three inches thick and six to twelve inches apart from one another. After that, it is necessary to water it on a consistent basis, particularly in the sun. After that, if the soil is still dry, you will need to water it.
In addition to that, you will still need to apply fertilizer as you normally would. If you additionally tend to your tomato plants, then some sort of insect or pest may cause damage to them.
Keep a watch out for them so that you may get rid of them right once. About three or four months after the plants were planted, you will start picking tomatoes. There are significantly more tomatoes, and they ripen much more quickly. You can harvest the plant when it is mature and still has its green color. If you want to sell it in the market, you should avoid harvesting it too early. Wait until it has ripened or turned orange before you harvest it for your family.
7. Malunggay
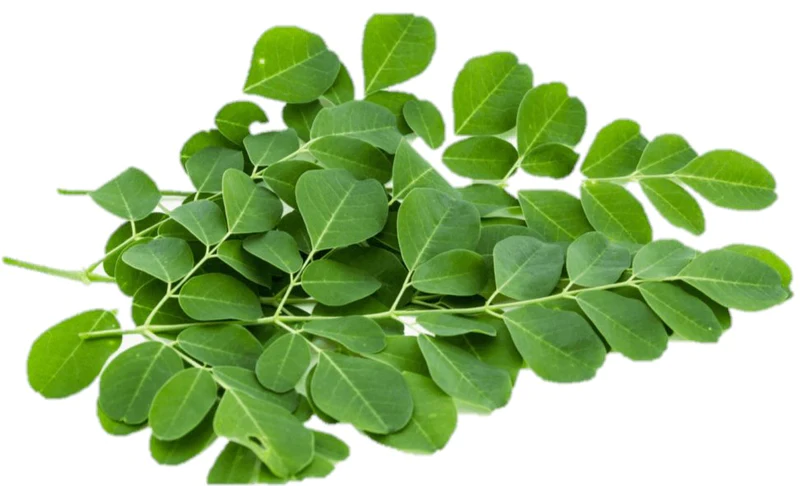
The Malunggay plant, also known as Moringa, is yet another stunning vegetable that may be grown in your own garden. It is high in a variety of nutrients, including vitamins and minerals, which may increase your chances of living a longer life. These vegetables not only have a pleasant flavor, but they are also quite simple to cultivate. This plant can be grown from either the seeds or the stems of the Malunggay plant.
If you desire for this vegetables to grow the plants from seeds, the seeds must first be fully developed and completely dry. Second, it would be helpful if you could select a sunny spot that gets plenty of direct sunshine for Malunggay. Sand makes up the soil here. Sand is the optimal medium for the growth of malunggay. If you wish to cultivate this, you can also make use of the stem of the malunggay plant.
When the malunggay stem cuttings have reached their maturity, they should be put in the ground directly. In addition to this, dig a pit that is moderately deep and fill it with rocks; this will ensure that the items do not shatter when you shake them. The fact that you water your Malunggay every day will also stop it from expanding. However, once it has been planted and allowed to grow vegetables of malunggay for a number of months, it will finally produce magnificent leaves.
8. Lettuce
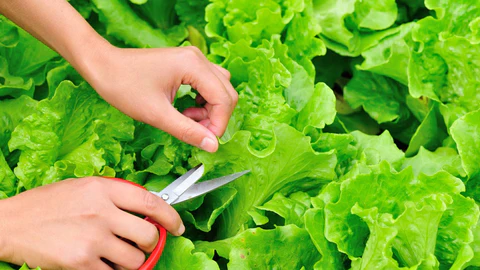
The plant known as lettuce or salad leaves is an annual member of the family. It is cultivated for its leaves the vast majority of the time, but it is also occasionally grown for its stem and seeds. Although salads are the most common application for lettuce as salad leaves, you might also find it in soups, sandwiches, or wraps. Lettuce can also be grilled. Lettuce is the most common application for lettuce. One variation known as celtuce (also known as asparagus lettuce) is grown specifically for the consumption of its stems, which can be either raw or cooked.
Read Also: Let’s Get Growing: The Basics of Hydroponics Gardening
The seeds for lettuce can be started by scattering a thin layer over the soil or potting material. Small seed starting pots or paper cups work well for this, and after few weeks you can transplant the seedlings to larger rectangular planters. If you want to grow lettuce in a container garden, use a medium-sized pot or large pots that’s at least 8 inches deep. To ensure the soil is consistently damp, mist it at least once daily.
In 5 days, the seeds will have sprouted. When the seedlings are at least 2 inches tall, thin them by taking away the weaker ones and leaving approximately an inch between each remaining plant. When young, the seedlings you pluck out make a great addition to sandwiches and salads (in the form of microgreens). Extreme heat can cause lettuce seedlings to wilt after just two hours in direct sunlight. Keep the soil moist throughout the day and night so the plant may rest and recover.
Your lettuce should be ready to pick after 6-8 weeks. Waiting too long between harvests can result in bitter or bland lettuce. In warm regions, most types of lettuce can attain a maximum height of 8 inches. The lettuce leaves can be harvested individually or the entire plant can be harvested at once. Start cutting from the edges and take no more than half the leaves during a cut-and-regrow cycle. The plant can then use this stored energy to produce additional leaves in preparation for the next harvest.