
You’ll have a much better idea of what you have on hand if your kitchen pantry is well organized. If you like to plan your meals, this will be a game changer. Rather than digging around for ingredients you could use up, you’ll have an easy way to see what you have on hand. Then, based on what’s nearby, you can quickly create meal plans! Read on for more information on how you can organize your pantry effectively.
8 Steps to Making an Organized Pantry
STEP 1 : Clear and take everything out
As a first step, you should completely empty your pantry. This step will help you get rid of the clutter and allow you to thoroughly clean the area before you begin organizing.
During this step, you can also make an inventory of everything you own. You’ll be able to tell the difference between items that should be kept and those that should be donated or thrown away. Even something you thought was lost could turn up!
Put everything on your kitchen counters and table.
STEP 2 : Everything that has expired should be discarded
After you’ve emptied your pantry organizer. Throw away any food essentials that are no longer edible. In this step, you’ll have enough space from the area to store your distinguishable consumables temporarily as well as enough space to move your pantry to prepare for cleaning the bottom part of it. Then, go through the food and identify everything you don’t believe your family will eat. Consider donating those items to a local food bank instead of throwing them in the trash.
The primary goal of this step is to keep only edible food. It may surprise you how much storage space you have simply by getting rid of old food.
STEP 3 : Clean the Pantry
You can now start cleaning everything thoroughly. Start washing off the shelves with a washcloth, soap, and water. Clean up any dust and food fragments that may have fallen from the table.
Wipe the food bags down as well while you have your rag out. Clean everything that is sticky or covered with dust. Make sure everything is neat and clean before restocking the pantry with any items.
Apply a sanitizing solution to your pantry organizer to remove germs as well as bacteria that build up on it.
STEP 4 : Use Clear Plastic Bins with Label
You can keep your pantry organized by using bins and organizers. The best containers for storing pantry essentials like flour and sugar are clear plastic canisters or glass jars with airtight closures. Smaller goods like seasoning packets can be kept organized inside your area by using baskets or see-through plastic containers.
Additionally, labeling makes it simple to distinguish between different kinds of seasonings that seem comparable (sugar, salt)
STEP 5 : Return and Categorize Foods
Sorting your pantry items into zones is an excellent way to organize them. Zones can help you find the food you need at the right time.
If you create zones for your food, you’ll know exactly where to put it when you get home from the grocery store. Furthermore, finding what you need while cooking will be simple.
The collection of pantry categories is as follows:
- Grains / Pastas
- Dry ingredients
- Wet ingredients
- Healthy snacks
- Junk food
- Breakfast foods
- Canned goods
- Seasonings / Spices
STEP 6 : Return everything to the Pantry Organizer
And you’re done with categorizing foods; it’s time to start placing everything back into the storage area. To make sure everything has a place, start with the larger items first. Then, gradually add smaller food items until everything has a place.
STEP 7 : Create a Child-Friendly Pantry area
Water bottles, snack containers, and cereal dispensers should all be placed on the bottom shelf so that your children may assist you in putting goods away and easily get refreshments. Utilize containers with built-in separators to provide a variety of nutritious options (like protein bars, fruit gummies and crackers). To ensure that kids maintain their organization, visibility and labeling are crucial.
STEP 8 : Keep non-food items elsewhere
Assess everything you took out of your pantry that isn’t even food. For as many of them as you can, look for other storage options. If possible, keep nothing else in your pantry than food. Keep this space from serving as your home’s “catch-all” for everything.
Those are the steps to consider to organize your pantry. We’re not yet close to the end. There are more things to do right after organizing your kitchen pantry to maintain it and help you keep practicing it.
Tips in Keeping Your Pantry Organized
Organizing your pantry and keeping it organized are two separate things. Here are some tips to keep the pantry clean and nice with the help of organizers.
- Use FIFO (First In, First Out). This approach is quite effective! Utilizing a first-in, first-out strategy is a smart move if you want to cut down on your family’s food waste. To save food from spoiling before it is used, this entails using older food items in your cupboard before using new ones. Placing the goods in the back of your pantry as you bring in fresh food will ensure that the older food gets used first.
- Invest on Cabinet with Sliding shelves. A cabinet with sliding shelves organizes all of your canned goods and nonperishable items. It allows for easy access without requiring a full closet for your pantry.
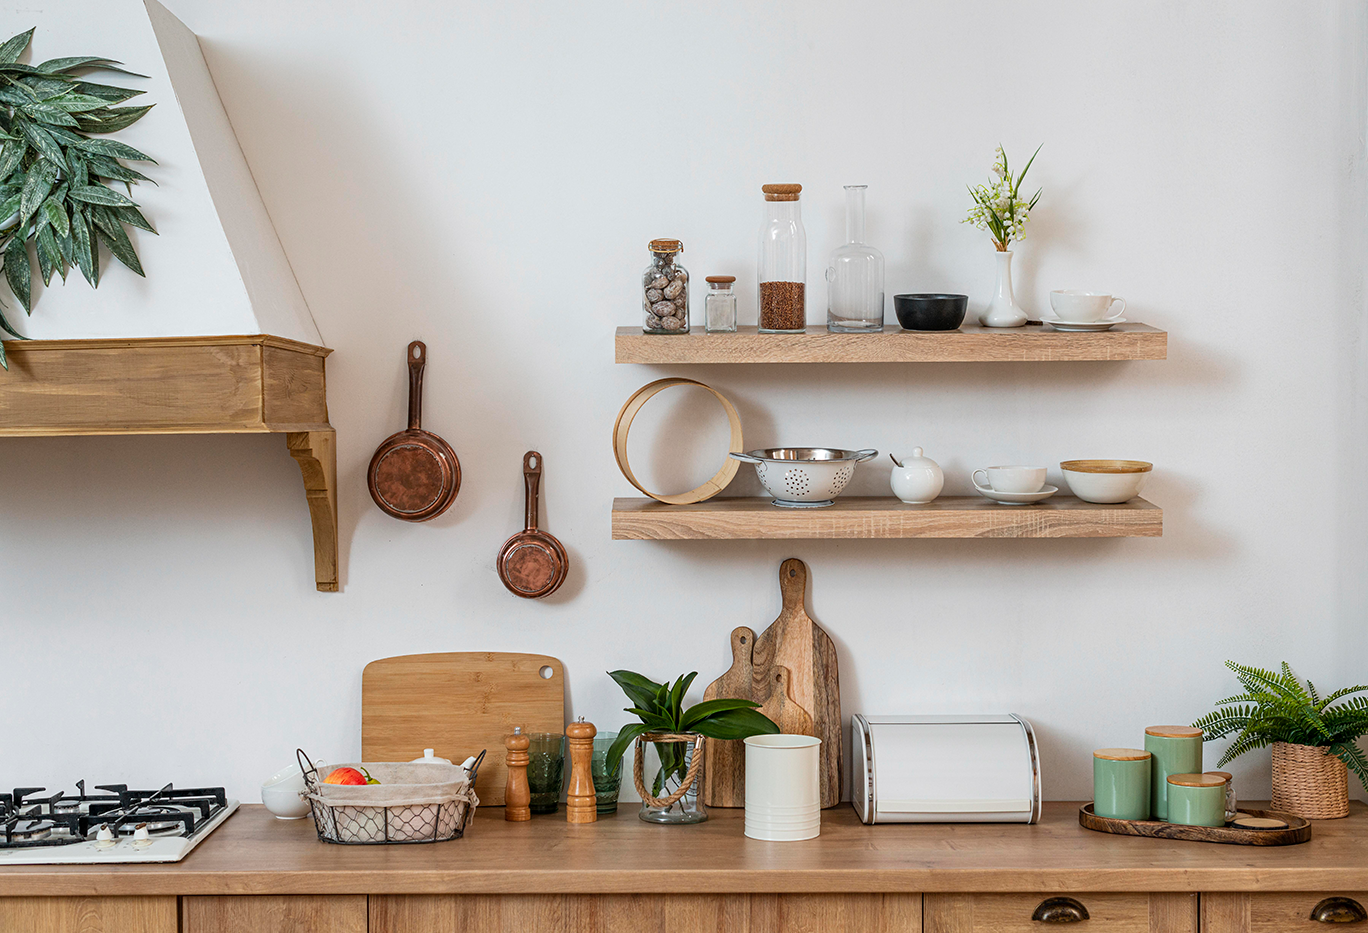
- Display Items. Convert your walls into more storage space. Pots and pans, a spice rack, and even floating shelves for cups and plates can be hung. If you have an empty wall, you have the option of adding more storage.
- Use visible storage. Try cabinets with glass doors instead of traditional cabinet shelves when storing food. To expand your shelf space, think about adding organizers like a lazy Susan or tiered shelving.
- Use square storage containers. Despite being attractive, they are a waste of space in your pantry organizer. Instead, choose rectangular storage that you can stack, arrange next to one another, and place in front of one another without losing any space, like the modular type outlined above. The only possible exception is if you decide to utilize jars instead of the typical huge, spherical containers for goods like flour and sugar because they are more compact.
As a whole, The above mentioned series of information regarding organizing a pantry guide might as well be used for your future house and lot or condominium from BRIA Homes. Your kitchen pantry is important for your family to serve them food that you’re sure that it’s safe and healthy as well.
BRIA Homes, one of the Philippines’ leading housing developers, aims to bring affordable house and lot packages and condominium units closer to ordinary Filipino families.